


The 3D Structure Creator role is a browser-based 3D modelling solution with all the essentials for structure and frame design, complete with a dedicated interface and feature set tailored for designers, engineers and fabricators. Not only you can create, but you can also share, and collaborate in real time with your team, customers, and clients in one simple cloud-based environment on the 3DEXPERIENCE platform.
Custom Profiles helps you to create your own required profiles as per your dimensions and shape which can be repetitive in use and saves the design cycle time.
To create Custom Profiles in 3D Structure Creator on the 3DEXPERIENCE Platform
Step1: Create a new collaborative space in 3D Space

Step2: Write the title, Description, Select Family as Standard – Collaborative storage to manage standard content and Visibility as Public – Content visible to all the users

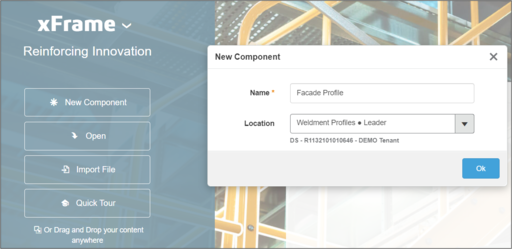
Step3: Go on to xFrame app under 3D Structure creator role > Type the Name > Location: Select the collaborative space which was created earlier > OK
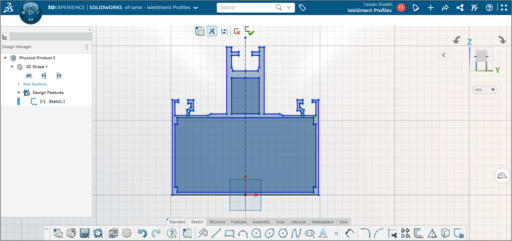
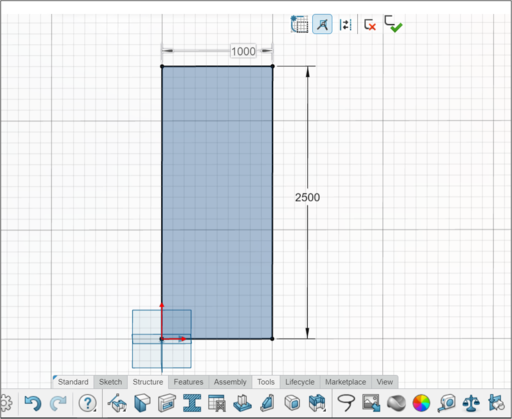
Step 4: Select Sketch > Front plane> Draw the required profile with the required dimensions and constraints
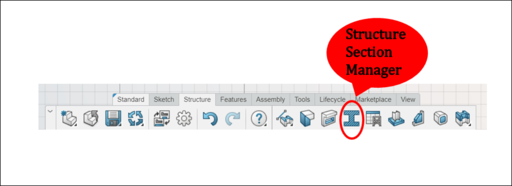
Step 5: After completing the sketch > Click on Structure Section Manager > Select New Standard > Type the Standard title > Select New Profile > Type Profile name > Select Custom profile as Profile type and select the sketch as profile sketch > Type Size Name and Select Custom Pierce Points under point reference If any > Set the Destination which was created in the 3D Space > Click on Save and Continue.

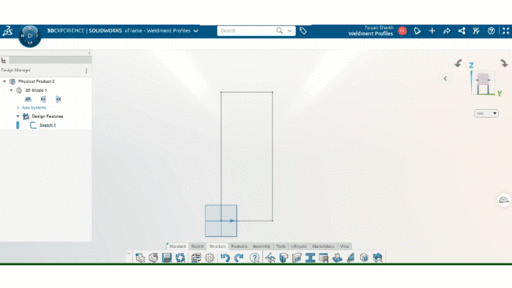
Step 6: Now create a new component in the xFrame app and create a new sketch as per the requirements.
Note: The sketch profile would be of the required structure.
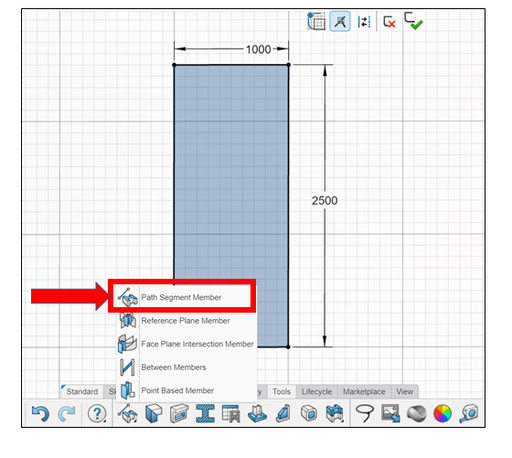
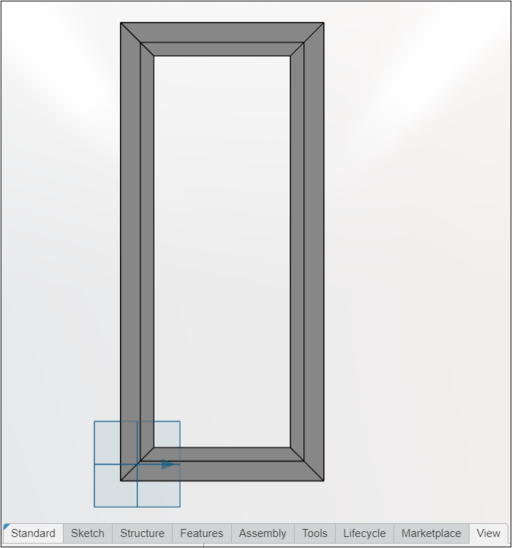
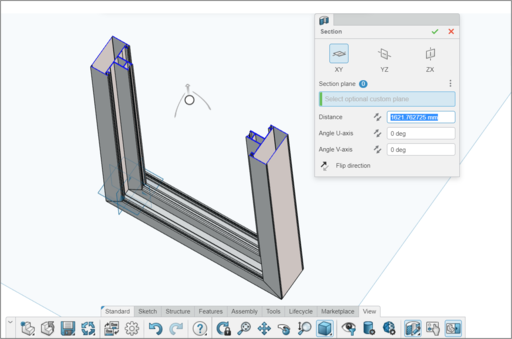
Step 7 : Click on Path Segment Member > Select the segments one by one > Select the Profile Source which was created earlier > Standard > Type > Size > Set the angle orientation as per the requirement > Check Automation corner trim> Click on Ok.
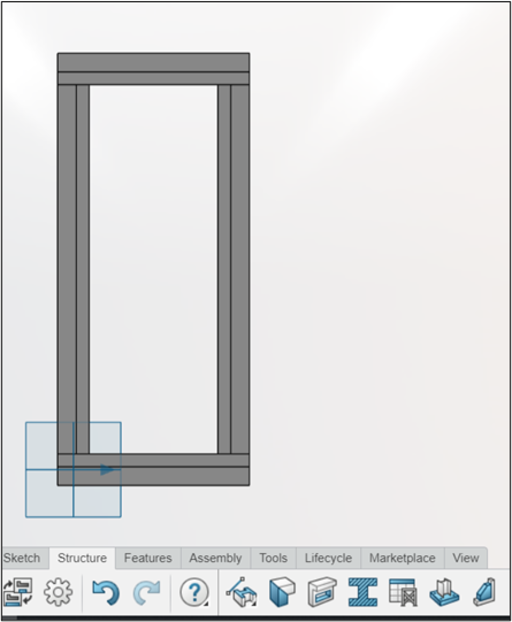
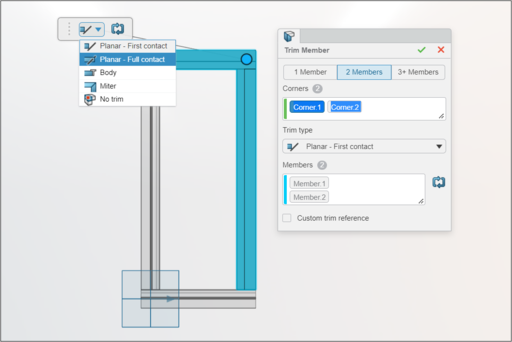
Step 8 : Click on trim member > Select the member > Set the trim type as Miter > Similarly follow the steps for all the members
Custom Profiles are very easy to set up, they save time during the design and reduce the information that is required on manufacturing drawings. It can be used to maintain a profile library directory which may be used in weldment part creation.
With a recent advantage in the perspective of the weldment industry non-standardized profiles may create as simple sketches which may help in accurate result creation at weldment profile part generation. This may add up to accurate control of geometric strength capabilities by simple weldment sketch profile modifications.
We Urge You To Call Us For Any Doubts & Clarifications That You May Have. We Are Eager to Talk To You
Call Us: +91 7406663589
 (1 votes, average: 5.00 out of 5)
#365/8, Ground Floor, "Hasmitha Avenue", 16th Main, 4th T Block East, Jayanagar, 4th T Block East, Pattabhirama Nagar, Jayanagar, Bengaluru, Karnataka 560041
Rated 4.7/5 with a total of 62 reviews
"CARAX" Building 4th Floor, 105/1/1/4, Next to Radha Hotel, Pune-Mumbai Xpress Way,Baner,Pune 411045
Rated 4.7/5 with a total of 17 reviews
1002, LODHA Supremus, I-Think Techno Campus,Kanjurmarg EAST - MUMBAI, MH, India – 400042.
Rated 5/5 with a total of 51 reviews
508, Shiti Ratna Complex, Panchwati Cross Road, Ahmedabad-380006
Rated 4.1/5 with a total of 7 reviews
Kanda's Villa, II Floor, AE Block,3362 R, 8th Street, Anna Nagar, Chennai, Tamil Nadu 600040
Rated 4.6/5 with a total of 16 reviews
Flat no F1, first floor, Nakhate corner, Eknath rang mandir road,New Usmanpura, Aurangabad, 431005.
A-101, 1st Floor, The Hub Complex, opp. Shete Hospital, Mahatma Nagar, Parijat Nagar, Nashik, Maharashtra 422005.
Level 7, Octave 3B Salarpuria Sattva Knowledge City, Inorbit Mall Road, Raidurg Village, Hi-tech City, Hyderabad, Telangana - 500081, India

Thanks for sharing. I read many of your blog posts, cool, your blog is very good.
Your point of view caught my eye and was very interesting. Thanks. I have a question for you.
Can you be more specific about the content of your article? After reading it, I still have some doubts. Hope you can help me.